
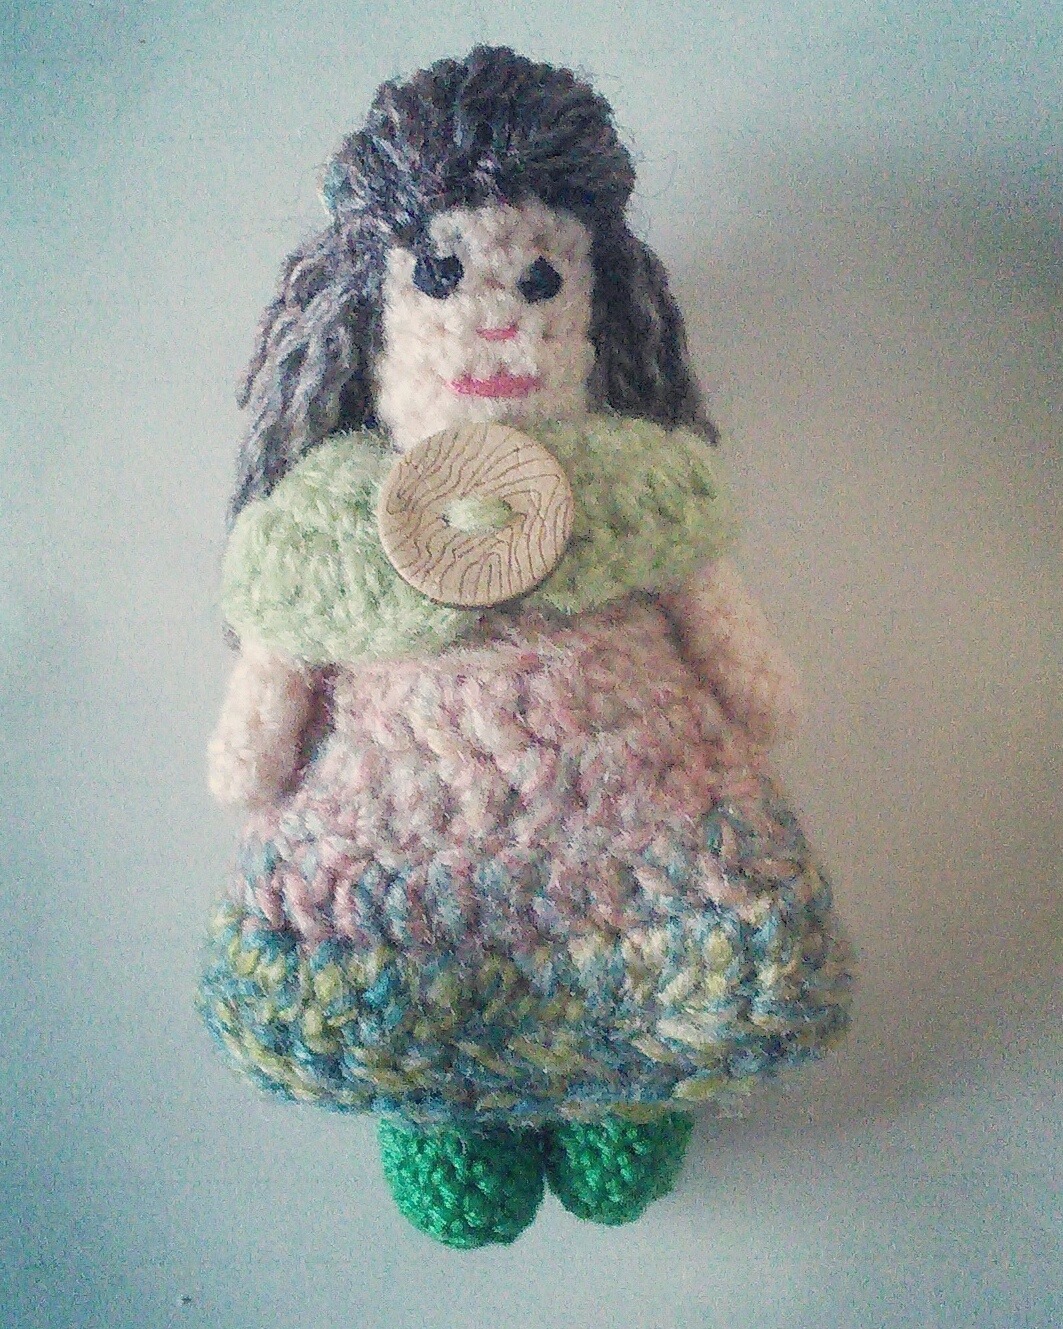
Meet the little Pixie. This was actually one of the first-ever toy patterns I designed. When I was trying to design Travelling Ava this is the design I came up with. I swear I don’t have any control over what materialises at the end of my hook. Even now with a current doll design, what I had planned to be about 15 cm is going to be at least double in size when I’m finished.
This pattern is made using DK yarn and a 2.5 mm hook and is written using UK crochet terminology. It is a great little pattern for using up small amounts of yarn in your stash.
Below you will find a list of the equipment you will need and a free copy of the pattern with instructions on how to assemble your very own Mini Pixie Doll.
Equipment
Yarn – Stylecraft Special DK
Hook – 2.5 mm
Sewing Needle
Scissors
Toy Stuffing
Stitch Marker
Button
Embroidery thread
Abbreviations
ch – Chain Stitch
dc – Double Crochet
dc2tog – Double crochet two
stitches together
ss – Slip Stitch
tr – Treble Stitch
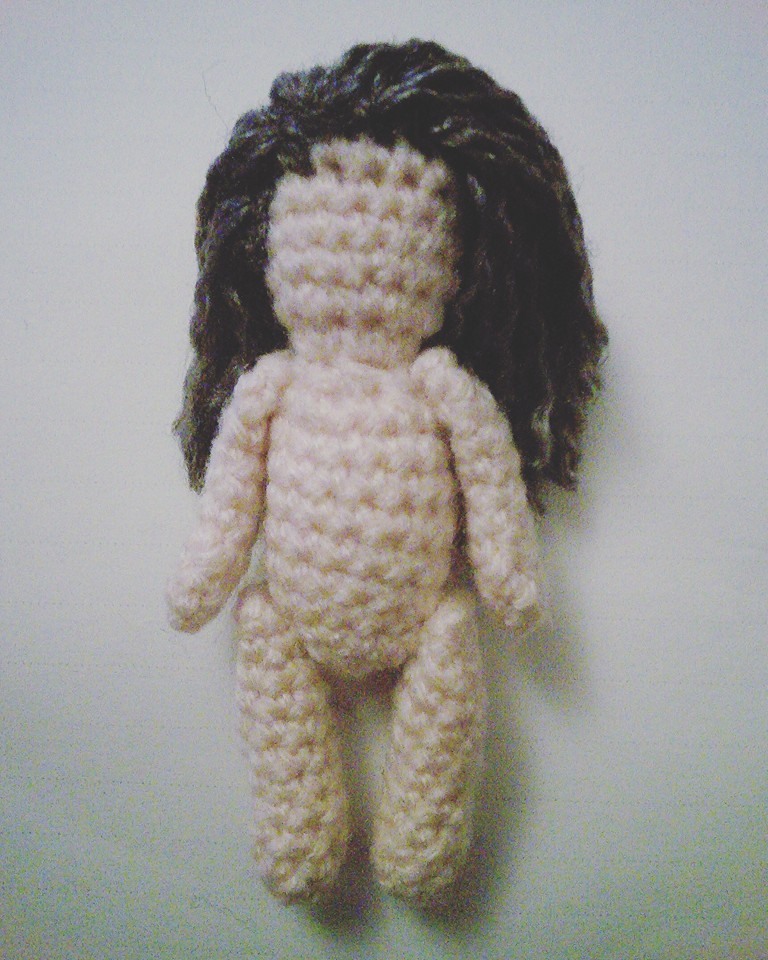
Pattern – Body and Head
Make a magic loop
Round 1: Ch 1, (does not count as a stitch), 5 dc into the loop (5)
Round 2: 2 dc in each stitch around (10)
Round 3: *1 dc, 2 dc in the next stitch* repeat 5 times (15)
Round 4 – Round 9: 1 dc in each stitch (15)
Round 10: *1 dc, dc2tog* repeat 5 times (10)
Stuff Body
Round 11: dc2tog, 5 times (5)
Round 12: 2 dc in each stitch around (10)
Round 13: *1 dc, 2 dc in next stitch* repeat 5 times (15)
Round 14 -Round 17: dc in each stitch (15)
Round 18: *1 dc, dc2tog* repeat 5 times (10)
Stuff Head
Round19: Dc2tog, 5 times (5)
Fasten off sewing in loose ends
Pattern Legs (make 2)
Make a magic loop
Round 1: Ch 1, (does not count as a stitch), 7 dc into the loop (7)
Round 2 – Round 11: 1 dc in each stitch around (7)
Stuff leg
Fasten off, sew in the loose end closing the top of the leg, leave a long tail for sewing
the leg to the body.
Pattern Arms (make 2)
Make a magic loop
Round 1: Ch 1, (does not count as a stitch), 6 dc into the loop (6)
Round 2 – Round 9: 1 dc in each stitch around (6)
I chose not to stuff the arms, you may want to add a small amount of stuffing at the
bottom of the arms, the choice is yours.
Fasten off, sew in the loose end closing the top of the arm, leave a long tail for sewing
the arm to the body.
To Assemble the Body
Position the arms and legs, you may want to use some pins to help you do this, using a needle sew the arms and legs to the body.

Pattern Underwear
(Note: I used embroidery thread to crochet the underwear but you could also use 4 ply yarn.)
Row 1: Ch 11
Row 2: dc in the second chain from hook, dc in each stitch until the end, ch 1, turn (10)
Row 3: dc in each stitch until the end, ch 1, turn (10)
Row 4: 1 dc, dc2tog, 1 dc in each of the next 4 stitches, dc2tog, 1 dc, ch 1, turn (8)
Row 5: 1 dc, dc2tog, 1 dc in each of the next 2 stitches, dc2tog, 1 dc, ch 1, turn (6)
Row 6: 1 dc, dc2tog, dc2tog, 1 dc, ch 1, turn (4)
Row 7 – 9: 1 dc in each stitch until the end, ch 1, turn (4)
Row 10: 1 dc, 2 dc in the next 2 stitches, 1 dc, ch 1, turn (6)
Row 11: 1 dc, 2 dc in the next stitch, 1 dc in each of the next 2 stitches, 2 dc in the next
stitch, 1 dc, ch 1, turn (8)
Row 12: 1 dc, 2 dc in the next stitch, 1 dc in each of the next 4 stitches, 2 dc in the next
stitch, 1 dc, ch 1, turn (10)
Row 13: 1 dc in each stitch until the end, ch 1, turn (10)
Row 14: 1 dc in each stitch until the end, fasten off (10)

Pattern Dress
Row 1: ch 15
Row 2: dc in the second chain from hook, dc in each stitch until the end, ch 1, turn (14)
Row 3: dc in each stitch until the end,ch 2, turn (14)
Row 4: *1 tr in the next 2 stitches, 2 tr in the next stitch* repeat 4 times, 1 tr in each
stitch to the end, ch 2, turn (18)
Row 5:*1 tr in the next 3 stitches, 2 tr in the next stitch* repeat 4 times, 1 tr in each stitch
to the end, ch 2, turn (22)
Row 6: *1 tr in the next 4 stitches, 2 tr in the next stitch* repeat 4 times, 1 tr in each
stitch to the end, ch 2, turn (26)
Row 7: 1 tr in the next 5 stitches, 2 tr in the next stitch* repeat 4 times, 1 tr in each stitch
to the end, ch 1, turn (30)
Row 8: dc in the bl of each stitch to the end, (30)
Fasten off, leave a long tail to sew the dress together.
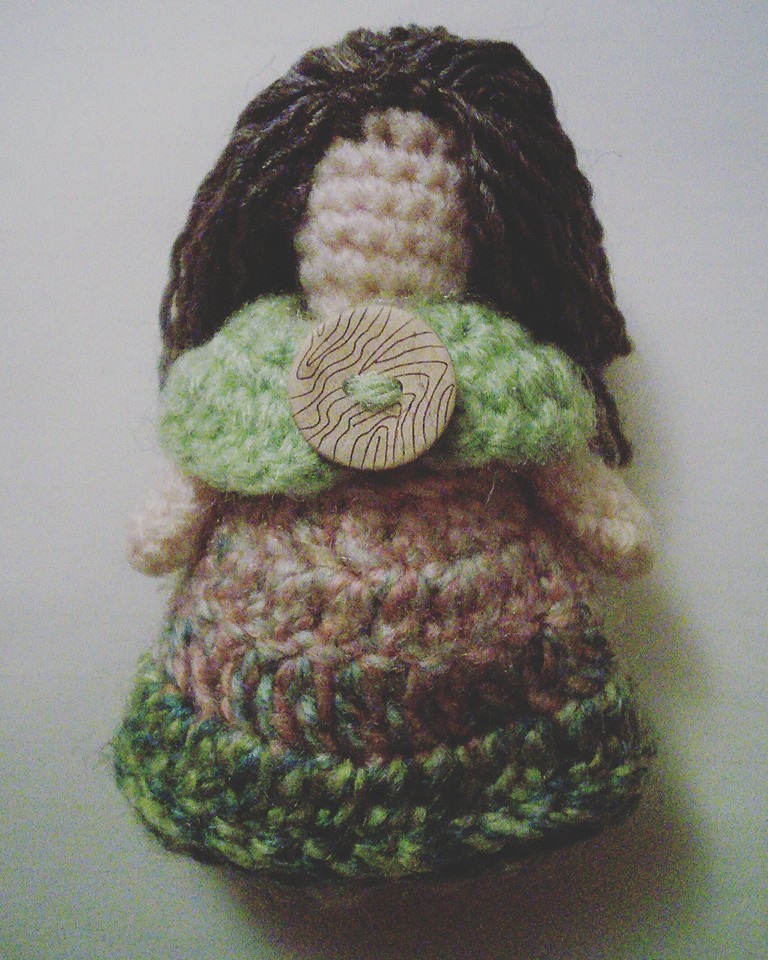
Pattern Shawl
Row 1: ch 15
Row 2: dc in the second chain from the hook, 2 dc in each of the next 2 stitches, 1 dc
in each of the next 8 stitches, 2 dc in each of the next 2 stitches, 1 dc in the next stitch,
ch 1, turn (18)
Row 3: 1 dc, 2 dc in each of the next 3 stitches, 1 dc in each of the next 10 stitches, 2
dc in each of the next 3 stitches, 1 dc, ch 2, turn (24)
Row 4: 1 tr in each until the end, fasten off sewing the shawl together, I then added a
button to the front to hide the seam and make it look extra cute
Pattern Shoes (make 2)
(Note: I used embroidery thread to crochet the shoes but you could also use 4 ply yarn.)
Make a magic loop
Round 1: Ch 1, (does not count as a stitch), 6 dc into the loop (6)
Round 2 – 6: 1 dc in each stitch around (6)
Fasten off, sew the long tail attaching the shoe to the foot.
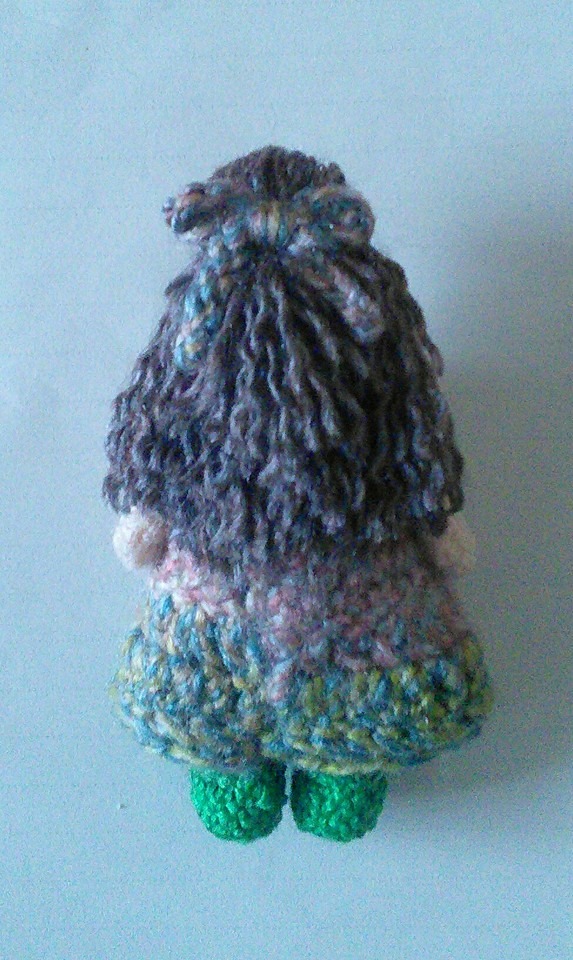
Adding hair
Check out this YouTube tutorial from Allison Hoffman if you would like
help to add hair to your doll, she demonstrates a few techniques.
I hope you had great fun making your own Mini Pixie Doll. Try different types of yarn and hook sizes to see what you can create. I would love to see the finished dolls, don’t forget to share on Twitter and Instagram using the #CrochetFolk
If you have any questions I would love to hear from you.
You can download a free pdf version of the pattern from Ravelry – Click Here
