
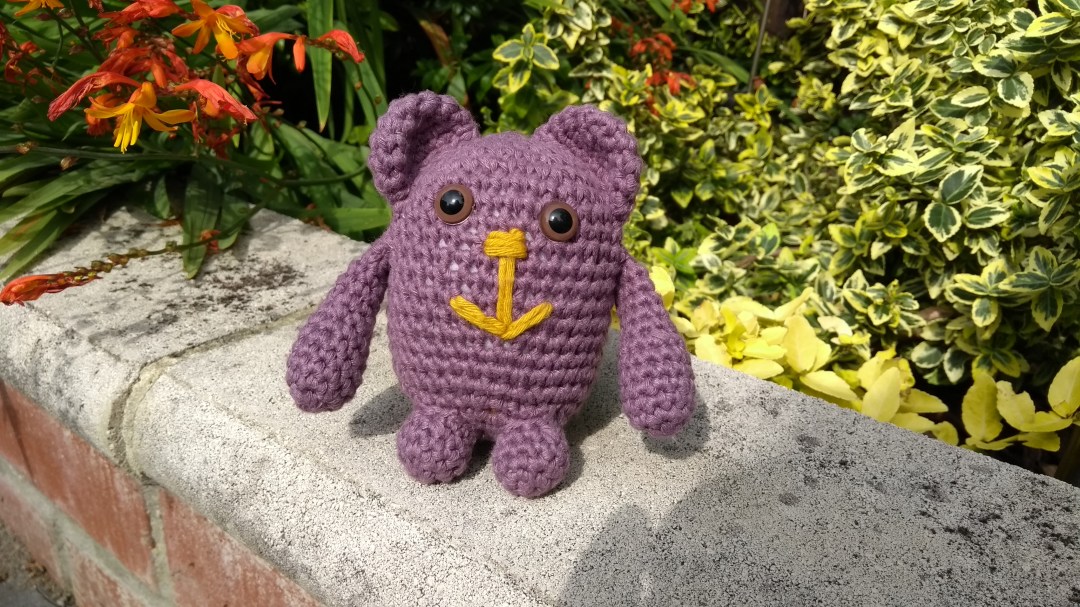
Meet Tony and he’s an Adventure Bear. What’s an Adventure Bear I hear you ask? A bear that has adventures of course.
This pattern is made using DK yarn and a 3.5 mm hook and is written using UK crochet terminology.
Below you will find a list of the equipment you will need and a free copy of the pattern with instructions on how to assemble your very own Adventure Bear.
Equipment
Recommended Yarn – DK weight – Drops Cotton Light Yarn A – 24 Grape Yarn B – 01 Off White
Hook – 3.5 mm
Sewing Needle
Scissors
Toy Stuffing
Safety Eyes (10 mm optional)
Stitch marker
Button
Abbreviations
dc – Double Crochet
dc2tog – Double crochet two stitches together
htr – Half treble stitch
tr – Treble Stitch
dtr – Double treble stitch
ss – slip stitch

Part 1 The Body
Using yarn A – (The body is worked from top to bottom)
Make a magic loop
Round 1: Ch 1 (does not count as a stitch), 6 dc into the loop (6)
Round 2: 2 dc in each stitch (12)
Round 3: *1 dc, 2 dc in the next stitch* repeat 6 times (18)
Round 4: * 2 dc, 2 dc in the next stitch* repeat 6 times (24)
Round 5: * 3 dc, 2 dc in the next stitch* repeat 6 times (30)
Round 6: * 4 dc, 2 dc in the next stitch* repeat 6 times (36)
Round 7 – 18: dc in each stitch (36)
Round 19: *dc 4, dc2tog* repeat 6 times (30)
Round 20: * dc 3, dc2tog* repeat 6 times (24)
Round 21: *dc 2, dc2tog* repeat 6 times (18)
Round 22: *dc 1, dc2tog* repeat 6 times (12)
Stuff the body and position safety eyes between row 8 and 9
Round 23: *dc2tog* repeat 6 times (6)
Fasten off and weave in ends
Part 2 – The Arms
Using yarn A make 2
Make a magic loop
Round 1: Ch 1 (does not count as a stitch), 6 dc into the loop (6)
Round 2: 2 dc in each stitch (12)
Round 3 – 6: dc in each stitch (12)
Stuff hand
Round 7: *dc 1, dc2tog* repeat 4 times (8)
Round 8 – 12: DC in each stitch (8)
Without stuffing the arm fasten off leaving a tail to sew the arm to the body
Part 3 – The Legs
Using yarn A make 2
Make a magic loop
Round 1: Ch 1 (does not count as a stitch), 6 dc into the loop (6)
Round 2: 2 dc in each stitch (12)
Round 3: dc in each stitch (12)
Round 4: * 4 dc, dc2tog* repeat twice (10)
Round 5:dc in each stitch (10)
Fasten off leaving a tail to sew the legs to the body
Part 4: The Ears
Using yarn A make 2
Make a magic loop
Round 1: Ch 1 (does not count as a stitch), 6 dc into the loop (6)
Round 2: 2 dc in each stitch (12)
Round 3: *1 dc, 2 dc in the next stitch* repeat 6 times (18)
Round 4: dc in each stitch (18)
Fasten off leaving a tail to sew the ears to the body
Part 5: The Wings
Using yarn B (make 2)
Make a magic loop
Round 1: Ch 1 (does not count as a stitch), 8 dc into the loop (8)
Round 2: In the first stitch 2 dc, next stitch 2 htr, next stitch 2 tr, next stitch 1 tr, ch 1, 1
dtr, next stitch 1 dtr, ch 1, 1 tr, next stitch 2 tr, next stitch 2 htr, final stitch 2 dc, ss in first
dc, fasten off – Leave a long tail for stitching the wing to the body.
To Assemble (these instructions are provided as a guide)
You may find it useful when assembling your bear to use pins to pin the legs and arms in position on the body. before sewing. Sew the legs in place on the front of the body. Use the photo as a guide. Add a small amount of stuffing to each leg as you sew the legs onto the body. Sew the arms onto the body between row 11 and 12.
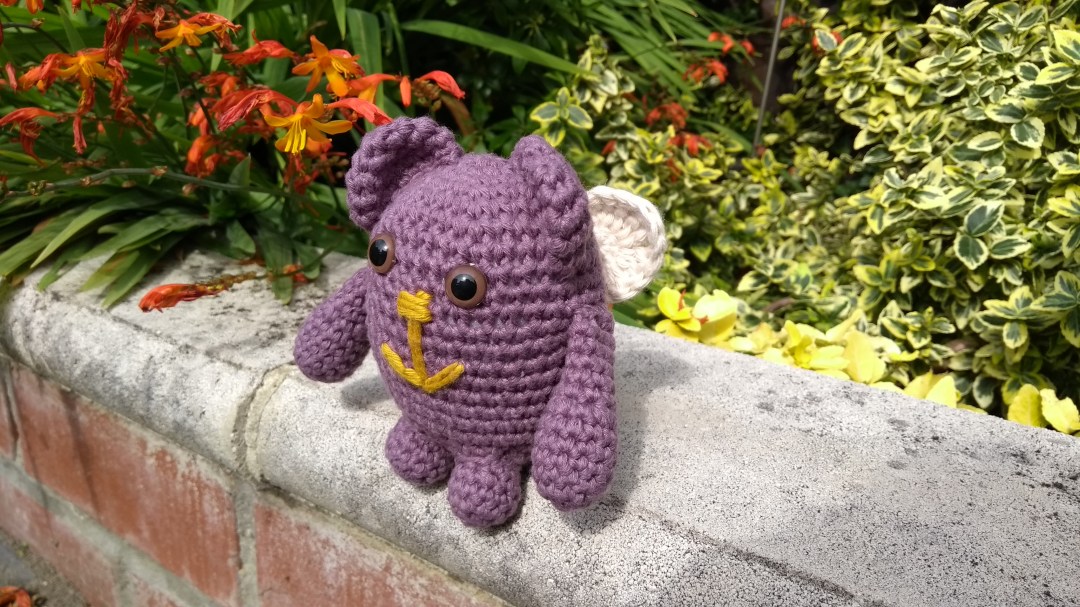
Ears should be sewn to the top of the body, use the photo as a guide. The ears are folded in half and sewn together before they are stitched to the body.
Use a contrasting colour yarn to sew a nose and mouth onto your bear.
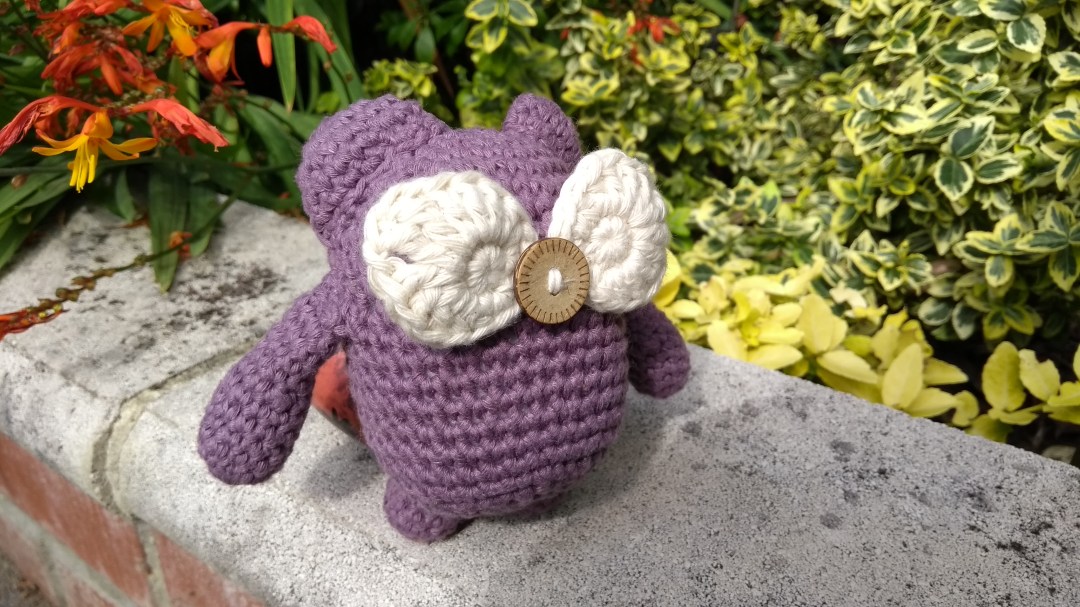
Sew the inside edge of each wing to the back of the body (around row 10). Once you’ve stitched the wings onto the body sew the button in the centre to hide your stitches.
I hope you had great fun making your own Adventure Bear. Try different types of yarn and hook sizes to see what you can create. I would love to see the finished bears, don’t forget to share on Twitter and Instagram using the #CrochetFolk
You can download a free pdf version of this pattern from Ravelry – Click Here
You can download a free pdf version of this pattern from Love Crafts – Click Here
